

You've probably heard how paramount blogging is to the success of your marketing. Without it, your SEO will tank, you'll have nothing to promote in social media, you'll have no clout with your leads and customers, and you'll have fewer pages to put those valuable calls-to-action that generate inbound leads. Need I say more?
So why, oh why, does almost every marketer I talk to have a laundry list of excuses for why they can't consistently blog? Maybe because, unless you're one of the few people who actually like writing, business blogging kind of stinks. You have to find words, string them together into sentences, and ughhh where do you even start?
Download our free blog post templates here to learn how to write 5 different types of blog posts.
Well my friend, the time for excuses is over.
After you read this post, there will be absolutely no reason you can't blog every single day -- and do it quickly. Not only am I about to provide you with a simple blogging formula to follow, but I'm also going to give you free templates for creating five different types of blog posts:
- The How-To Post
- The List-Based Post
- The Curated Collection Post
- The SlideShare Presentation Post
- The Newsjacking Post
With all this blogging how-to, literally anyone can blog as long as they truly know the subject matter they're writing about. And since you're an expert in your industry, there's no longer any reason you can't sit down every day and hammer out an excellent blog post.
How to Write a Blog Post: A Simple Formula to Follow
Step 1: Understand your audience.
Before you start to write, have a clear understanding of your target audience. What do they want to know about? What will resonate with them? This is where creating your buyer personas comes in handy. Consider what you know about your buyer personas and their interests while you're coming up with a topic for your blog post.
For instance, if your readers are millennials looking to start their own business, you probably don't need to provide them with information about getting started in social media -- most of them already have that down. You might, however, want to give them information about how to adjust their approach to social media from a more casual, personal one to a more business-savvy, networking-focused approach. That kind of tweak is what separates you from blogging about generic stuff to the stuff your audience really wants (and needs) to hear.
Don't have buyer personas in place for your business? Here are a few resources to help you get started:
- Create Buyer Personas for Your Business [Free Template]
- Blog Post: How to Create Detailed Buyer Personas for Your Business
- MakeMyPersona.com [Free Tool]

Step 2: Start with a topic and working title.
Before you even write anything, you need to pick a topic for your blog post. The topic can be pretty general to start with. For example, if you're a plumber, you might start out thinking you want to write about leaky faucets. Then you might come up with a few different working titles -- in other words, iterations or different ways of approaching that topic to help you focus your writing. For example, you might decide to narrow your topic to "Tools for Fixing Leaky Faucets" or "Common Causes of Leaky Faucets." A working title is specific and will guide your post so you can start writing.
Let's take a real post as an example: "How to Choose a Solid Topic for Your Next Blog Post." Appropriate, right? The topic, in this case, was probably simply "blogging." Then the working title may have been something like, "The Process for Selecting a Blog Post Topic." And the final title ended up being "How to Choose a Solid Topic for Your Next Blog Post."
See that evolution from topic, to working title, to final title? Even though the working title may not end up being the final title (more on that in a moment), it still provides enough information so you can focus your blog post on something more specific than a generic, overwhelming topic.
If you're having trouble coming up with ideas, check out this blog post from my colleague Ginny Soskey. In this post, Soskey walks through a helpful process for turning one idea into many. Similar to the "leaky faucet" example above, she suggests that you "iterate off old topics to come up with unique and compelling new topics." This can be done by:
- Changing the topic scope
- Adjusting the time frame
- Choosing a new audience
- Taking a positive/negative approach
- Introducing a new format
Step 3: Write an intro (and make it captivating).
We've written more specifically about writing captivating introductions in the post, "How to Write an Introduction [Quick Tip]," but let's review, shall we?
First, grab the reader's attention. If you lose the reader in the first few paragraphs -- or even sentences -- of the introduction, they will stop reading even before they've given your post a fair shake. You can do this in a number of ways: tell a story or a joke, be empathetic, or grip the reader with an interesting fact or statistic.
Then describe the purpose of the post and explain how it will address a problem the reader may be having. This will give the reader a reason to keep reading and give them a connection to how it will help them improve their work/lives. Here's an example of a post that we think does a good job of attracting a reader's attention right away:

Step 4: Organize your content.
Sometimes, blog posts can have an overwhelming amount of information -- for the reader and the writer. The trick is to organize the info so readers are not intimidated by the length or amount of content. The organization can take multiple forms -- sections, lists, tips, whatever's most appropriate. But it must be organized!
Let's take a look at the post, "How to Use Snapchat: A Detailed Look Into HubSpot’s Snapchat Strategy." There is a lot of content in this post, so we broke it into a few different sections using the following headers: How to Setup Your Snapchat Account, Snaps vs. Stories: What's the Difference?, and How to Use Snapchat for Business. These sections are then separated into sub-sections that to go into more detail and also make the content easier to read.
To complete this step, all you really need to do is outline your post. That way, before you start writing, you know which points you want to cover, and the best order in which to do it. To make things even easier, you can also download and use our free blog post templates, which are pre-organized for five of the most common blog post types. Just fill in the blanks!
Step 5: Write!
The next step -- but not the last -- is actually writing the content. We couldn't forget about that, of course.
Now that you have your outline/template, you're ready to fill in the blanks. Use your outline as a guide and be sure to expand on all of your points as needed. Write about what you already know, and if necessary, do additional research to gather more information, examples, and data to back up your points, providing proper attribution when incorporating external sources. Need help finding accurate and compelling data to use in your post? Check out this roundup of sources -- from Pew Research to Google Trends.
If you find you're having trouble stringing sentences together, you're not alone. Finding your "flow" can be really challenging for a lot of folks. Luckily, there are a ton of tools you can lean on to help you improve your writing. Here are a few to get you started:
- Power Thesaurus: Stuck on a word? Power Thesaurus is a crowdsourced tool that provides users with a ton of alternative word choices from a community of writers.
- ZenPen: If you're having trouble staying focused, check out this distraction-free writing tool. ZenPen creates a minimalist "writing zone" that's designed to help you get words down without having to fuss with formatting right away.
- Cliché Finder: Feeling like your writing might be coming off a little cheesy? Identify instances where you can be more specific using this handy cliché tool.
For a complete list of tools for improving your writing skills, check out this post. And if you're looking for more direction, the following resources are chock-full of valuable writing advice:
- The Marketer's Pocket Guide to Writing Well [Free Ebook]
- How to Write Compelling Copy: 7 Tips for Writing Content That Converts
- How to Write With Clarity: 9 Tips for Simplifying Your Message
- Your Blog Posts Are Boring: 9 Tips for Making Your Writing More Interesting
- Your Blog Posts Are Boring: 9 Tips for Making Your Writing More Interesting
Step 6: Edit/proofread your post, and fix your formatting.
You're not quite done yet, but you're close! The editing process is an important part of blogging -- don't overlook it. Ask a grammar-conscious co-worker to copyedit and proofread your post, and consider enlisting the help of The Ultimate Editing Checklist. And if you're looking to brush up on your own self-editing skills, turn to these helpful posts for some tips and tricks to get you started:
- Confessions of a HubSpot Editor: 11 Editing Tips From the Trenches
- How to Become a More Efficient Editor: 12 Ways to Speed Up the Editorial Process
- 10 Simple Edits That'll Instantly Improve Any Piece of Writing
When you're ready to check your formatting, keep the following advice in mind ...
Featured Image

Make sure you choose a visually appealing and relevant image for your post. As social networks treat content with images more prominently, visuals are now more responsible than ever for the success of your blog content in social media. In fact, it's been shown that content with relevant images receives 94% more views than content without relevant images.
For help selecting an image for your post, read "How to Select the Perfect Image for Your Next Blog Post" -- and pay close attention to the section about copyright law.
Visual Appearance
No one likes an ugly blog post. And it's not just pictures that make a post visually appealing -- it's the formatting and organization of the post, too.
In a properly formatted and visually appealing blog post, you'll notice that header and sub-headers are used to break up large blocks of text -- and those headers are styled consistently. Here's an example of what that looks like:

Also, screenshots should always have a similar, defined border (see screenshot above for example) so they don't appear as if they're floating in space. And that style should stay consistent from post to post.
Maintaining this consistency makes your content (and your brand) look more professional, and makes it easier on the eyes.
Topics/Tags
Tags are specific, public-facing keywords that describe a post. They also allow readers to browse for more content in the same category on your blog. Refrain from adding a laundry list of tags to each post. Instead, put some thought into a tagging strategy. Think of tags as "topics" or "categories," and choose 10-20 tags that represent all the main topics you want to cover on your blog. Then stick to those.
Step 7: Insert a call-to-action (CTA) at the end.
At the end of every blog post, you should have a CTA that indicates what you want the reader to do next -- subscribe to your blog, download an ebook, register for a webinar or event, read a related article, etc. Typically, you think about the CTA being beneficial for the marketer. Your visitors read your blog post, they click on the CTA, and eventually you generate a lead. But the CTA is also a valuable resource for the person reading your content -- use your CTAs to offer more content similar to the subject of the post they just finished reading.
In the blog post, "What to Post on Instagram: 18 Photo & Video Ideas to Spark Inspiration," for instance, readers are given actionable ideas for creating valuable Instagram content. At the end of the post is a CTA referring readers to download a comprehensive guide on how to use Instagram for business:
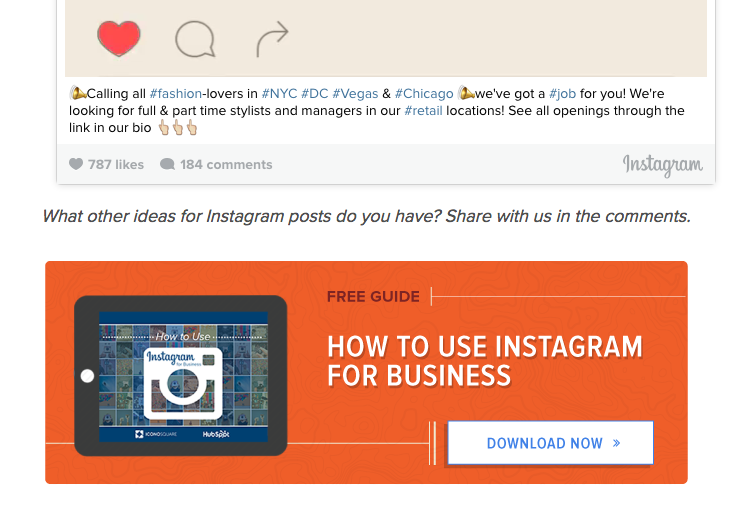
See how that's a win-win for everyone? Readers who want to learn more have the opportunity to do so, and the business receives a lead they can nurture ... who may even become a customer! Learn more about how to choose the right CTA for every blog post in this article. And check out this collection of clever CTAs to inspire your own efforts.
Step 8: Optimize for on-page SEO.
After you finish writing, go back and optimize your post for search.
Don't obsess over how many keywords to include. If there are opportunities to incorporate keywords you're targeting, and it won't impact reader experience, do it. If you can make your URL shorter and more keyword-friendly, go for it. But don't cram keywords or shoot for some arbitrary keyword density -- Google's smarter than that!
Here's a little reminder of what you can and should look for:
Meta Description
Meta descriptions are the descriptions below the post's page title on Google's search results pages. They provide searchers with a short summary of the post before clicking into it. They are ideally between 150-160 characters and start with a verb, such as "Learn," "Read," or "Discover." While meta descriptions no longer factor into Google's keyword ranking algorithm, they do give searchers a snapshot of what they will get by reading the post and can help improve your clickthrough rate from search.
Page Title and Headers
Most blogging software uses your post title as your page title, which is the most important on-page SEO element at your disposal. But if you've followed our formula so far, you should already have a working title that will naturally include keywords/phrases your target audience is interested in. Don't over-complicate your title by trying to fit keywords where they don't naturally belong. That said, if there are clear opportunities to add keywords you're targeting to your post title and headers, feel free to take them. Also, try to keep your headlines short -- ideally, under 65 characters -- so they don't get truncated in search engine results.
Anchor Text
Anchor text is the word or words that link to another page -- either on your website or on another website. Carefully select which keywords you want to link to other pages on your site, because search engines take that into consideration when ranking your page for certain keywords.
It's also important to consider which pages you link to. Consider linking to pages that you want to rank well for that keyword. You could end up getting it to rank on Google's first page of results instead of its second page, and that ain't small potatoes.
Mobile Optimization
With mobile devices now accounting for nearly 2 out of every 3 minutes spent online, having a website that is responsive or designed for mobile has become more and more critical. In addition to making sure your website's visitors (including your blog's visitors) have the best experience possible, optimizing for mobile will score your website some SEO points.
Back in 2015, Google made a change to its algorithm that now penalizes sites that aren't mobile optimized. This month (May 2016), Google rolled out their second version of the mobile-friendly algorithm update -- creating a sense of urgency for the folks that have yet to update their websites. To make sure your site is getting the maximum SEO benefit possible, check out this free guide: How to Make a Mobile-Friendly Website: SEO Tips for a Post-"Mobilegeddon" World.
Step 9: Pick a catchy title.
Last but not least, it's time to spruce up that working title of yours. Luckily, we have a simple formula for writing catchy titles that will grab the attention of your reader. Here's what to consider:
- Start with your working title.
- As you start to edit your title, keep in mind that it's important to keep the title accurate and clear.
- Then, work on making your title sexy -- whether it's through strong language, alliteration, or another literary tactic.
- If you can, optimize for SEO by sneaking some keywords in there (only if it's natural, though!).
- Finally, see if you can shorten it at all. No one likes a long, overwhelming title -- and remember, Google prefers 65 characters or fewer before it truncates it on its search engine results pages.
If you've mastered the steps above, learn about some way to take your blog posts to the next level in this post. What other steps do you take to refine your blog posts? Don't forget to download your five free blog post templates right here.
This post is dedicated to Ravi Navik and Herman Jadhav for engaging so fully. Thanks guys. Please comment, like and subscribe guys. All comments are responded to on the same day.
 |
Credit Goes to Rachel Sprung | @rsprung for this amazing article |
